(Technical photographic exercise photos on flickr http://www.flickr.com/photos/58240633@N05/sets/72157631961533697/) 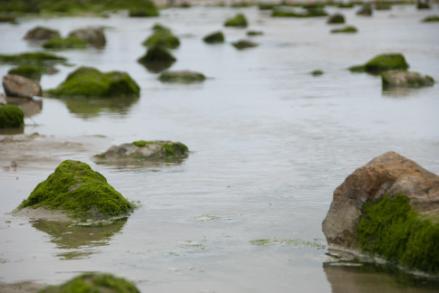 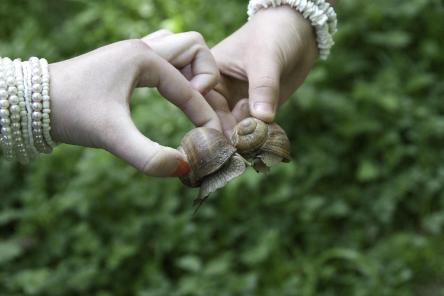 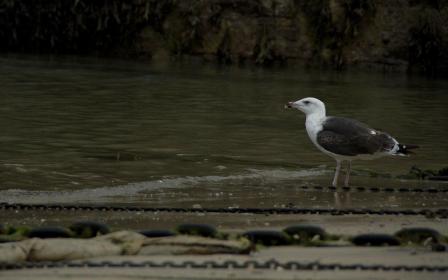 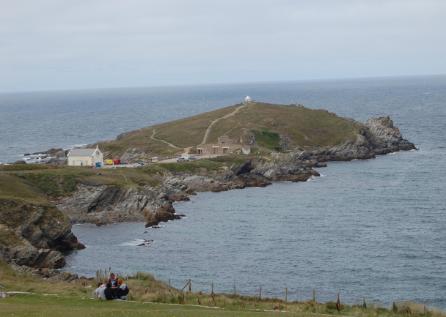 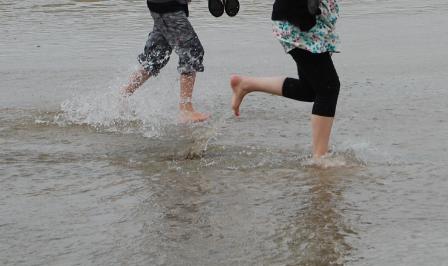  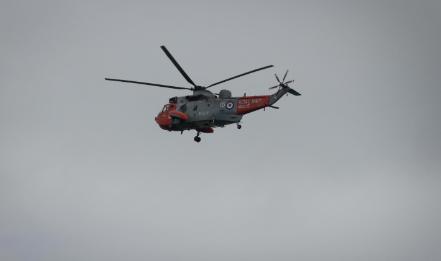  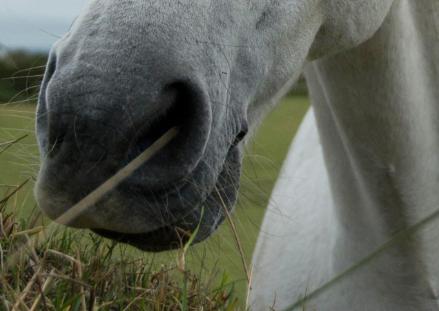 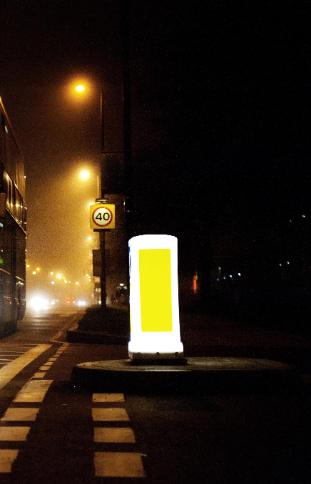 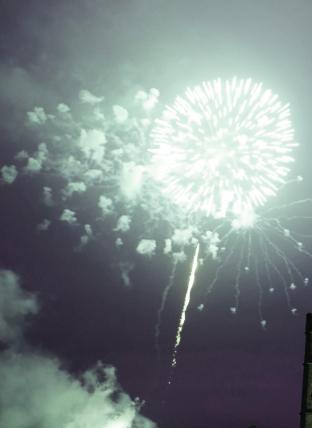 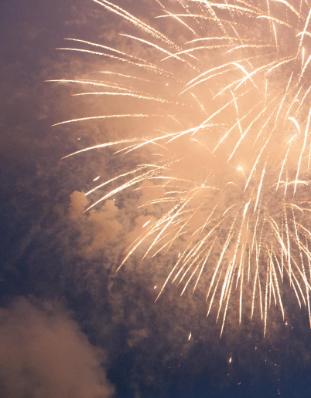 |
 Depth Of Field Depth of field refers to the amount of subject which is in focus, the smaller the aperture the larger the depth of field and the bigger the aperture the smaller the depth of field. The first four images demonstrated on this page show the use of different depth of fields. To take the first and second photos I used F-stop 6(f6) which shows a shallow depth of field because the low f-stop pinpoints the focus on one area, this can be seen on the rocks and snails at the foreground of the picture and the rest of the image is out of focus. The third and fourth picture shown on this page demonstrate a larger depth of field which allows me to have the foreground and the background in focus. For the third image I used F-stop 11(f11) which as you can see keeps more within the picture in focus, only the far front an back are slightly out of focus but the majority in the framing of the photo like the seagull and the water are in focus. For the fourth image I used F-stop 16(f16), and as clearly seen the whole photo is in focus. When capturing a view or a landscape your more likely to want to use a very large depth of field, to keep the whole photo in sharp focus from the foreground all the way through to the background like I have done on this picture of the view from the top of a hill into the sea in Newquay, everything if in focus through the image. Shutter Speed Shutter speed is simply the length of time that the light hits the film or sensor allowing the image to be recorded. The quicker the shutter speed the more it freezes an image and the slower the shutter speed the more blur and movement it captures. In this image of two subjects running I have used a medium to slow shutter speed of 1/200s. This can be seen by the blurriness capture in the movement of the water. I can see how the water travels by the way movement was caught, whereas when capturing this same image with 1/1000s the water would be completely still, you would be able to capture each drop of the water being splashed. This photo also contains elements of breaking the edge. Below the running picture is a photo I captured of an Air Force helicopter during my trip to Newquay. As you can see the helicopters propellers are very clear, no blur was captured. This is because I used a very high shutter speed of 1/1000s which freezes the movement of the fast moving helicopter. To capture an example of a really slow shutter speed I took a photo of someone walk fast. I used 1/20s because I wanted to capture the movement of this person walking past the camera, the really slow shutter creates a blurry effect in the areas that moved whilst the photo was being taken.
Below and Above The photograph of the Helicopter and my sister are good examples of how I used different camera angles (below and above the subject). Breaking the Edge Breaking the edge is about capturing parts of the location or body, with the idea of making the viewer imagine the missing parts of the photo or even challenging the viewer to guess what the photo is of. Many photos that break the edge have a sense of voyeurism, nothing is staged only snap shots with a sense of naturalism are used to create these photographs. I experimented with this technique whilst on my trip to Newquay, instead of taking a normal photo of a horse I tried an abstract approach to it by capturing only part of the head, only giving away what his mouth and nose look like making the audience use their imagination to see beyond the edge of the frame to what cannot be seen.With this night photo on the left I was experimenting an playing around with taking images without the flash at night. I really liked how the lighting look on this foggy night so my main priority was to capture this lighting in the pictures. When done with flash the effect the street lamps light have against the mist was lost so I used no flash with F-stop 2.8 and shutter speed 1/500s. It was important to use a low F-number to allow as much light through the lens as possible, the lack of lighting is what creates the grainy effect on the photograph. Night Flash On bonfire night I decided to experiment with the fire works how they come out in the photos when using flash and no flash during the night. When taking the first firework photo I didn't use flash which resulted in a more blurry and less detail effect from the firework. The second photograph was taken with a flash which explains why the firework and the smoke around it have a lot of detail and there is a very clear contrast between the background and the firework exploding effect. |